Step right up! Come one, come all! Win a ribbon at the Quilt Fair by Tasha Noel!
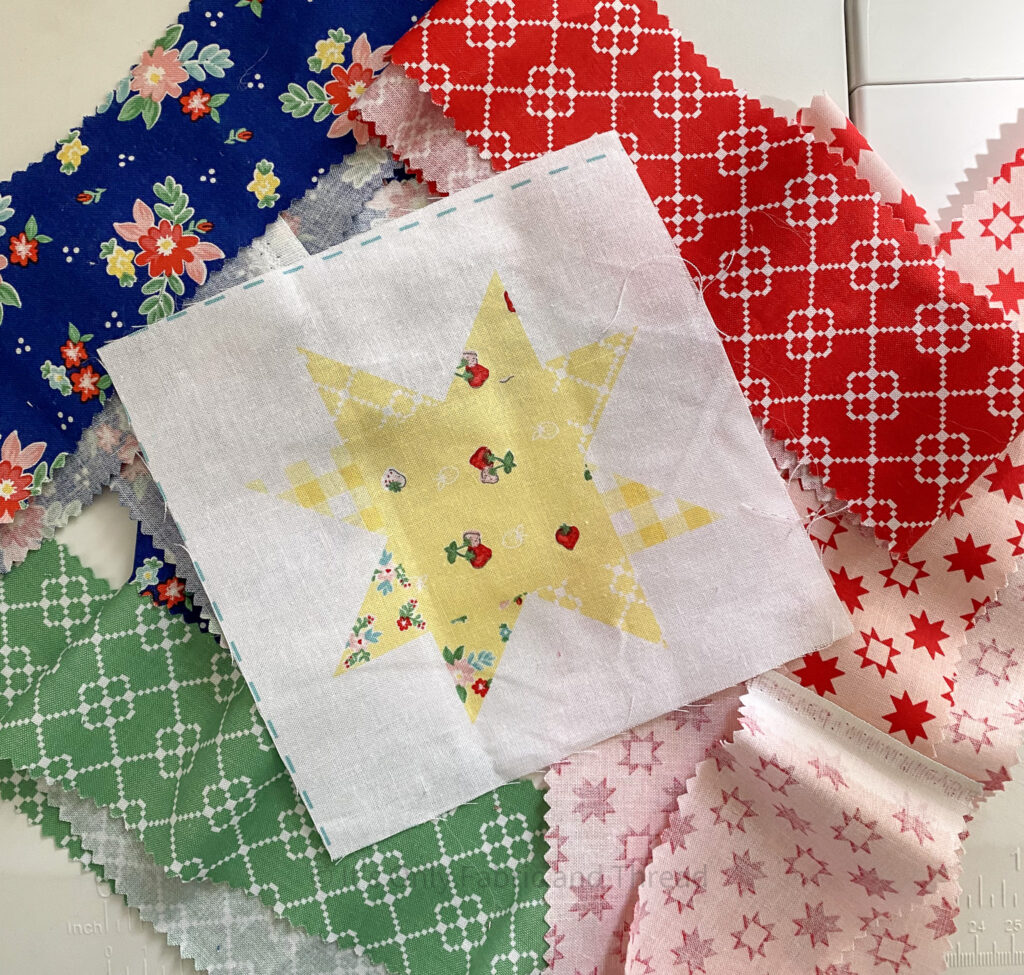
I was absolutely smitten with this Riley Blake Collection by Tasha Noel that includes carnival tents, ferris wheels, cotton candy, strawberries and the ever-lovely floral patterns on navy, yellow, pink, aqua, blue, red, and green. This collection also has such a fun sawtooth star panel with 6″ blocks that I wanted to use to make a fun and just for me project.
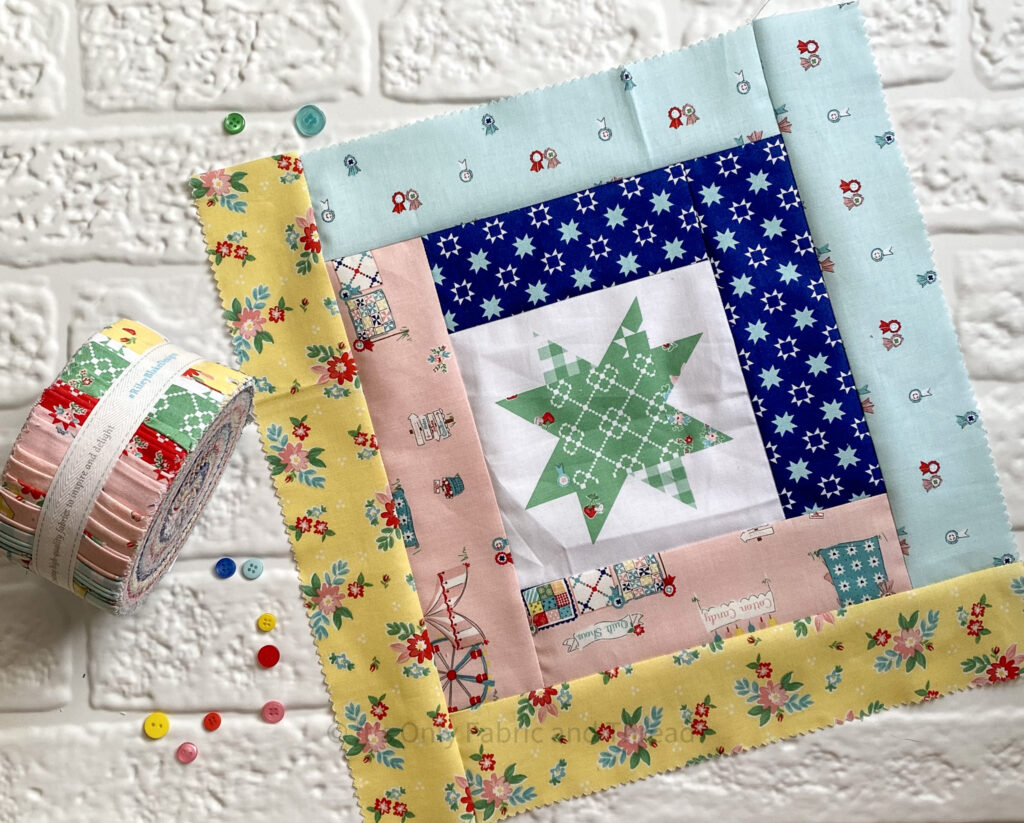
I decided on a modified log cabin block that used the 6″ sawtooth star square blocks from the panel along with a jelly roll (hello less cutting!) This is such a simple block, but I wanted to share step by step how you could make this block. I could totally see this block being constructed using scraps or even fussy cutting some fun fabrics for the center 6″ block.
Make sure to check out a sneak peak of what I am doing with all my blocks at the end of the post!
Traditional Log Cabin Quilt Block
The Log Cabin block is a traditional design that is simple but appears intricate to non-quilters. Its easy construction is disguised by the color and layout which creates an amazing quilt.
Traditionally, a log cabin block is built with both light and dark fabrics, but you may can mix colors and prints to get a hodge-podge of blocks for a unique look.
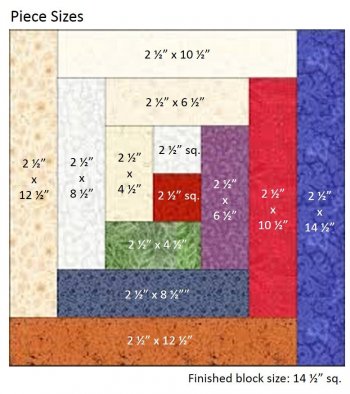
The log cabin block is constructed using strips, and you can set the width of the strip to suit the finished look of your design. If you want to reduce the time spent cutting fabric, you can use jelly rolls and the following diagram gives you the measurements of the various pieces of the block using the 2 ½” width of a jelly roll. You can easily use this diagram as a guide when working out the math for strips of other widths. Or you can find a pattern that has the math done for you!
Modified Log Cabin Block using 6″ Sawtooth Star Block
The construction of this modified block follows the same general premise as the traditional log cabin block. However, instead of beginning with the traditional 2 1/2″ square, you will begin with a 6″ block. In this case I used the 6″ sawtooth star blocks from the Quilt Fair Scrappy Stars Cheater Panel.
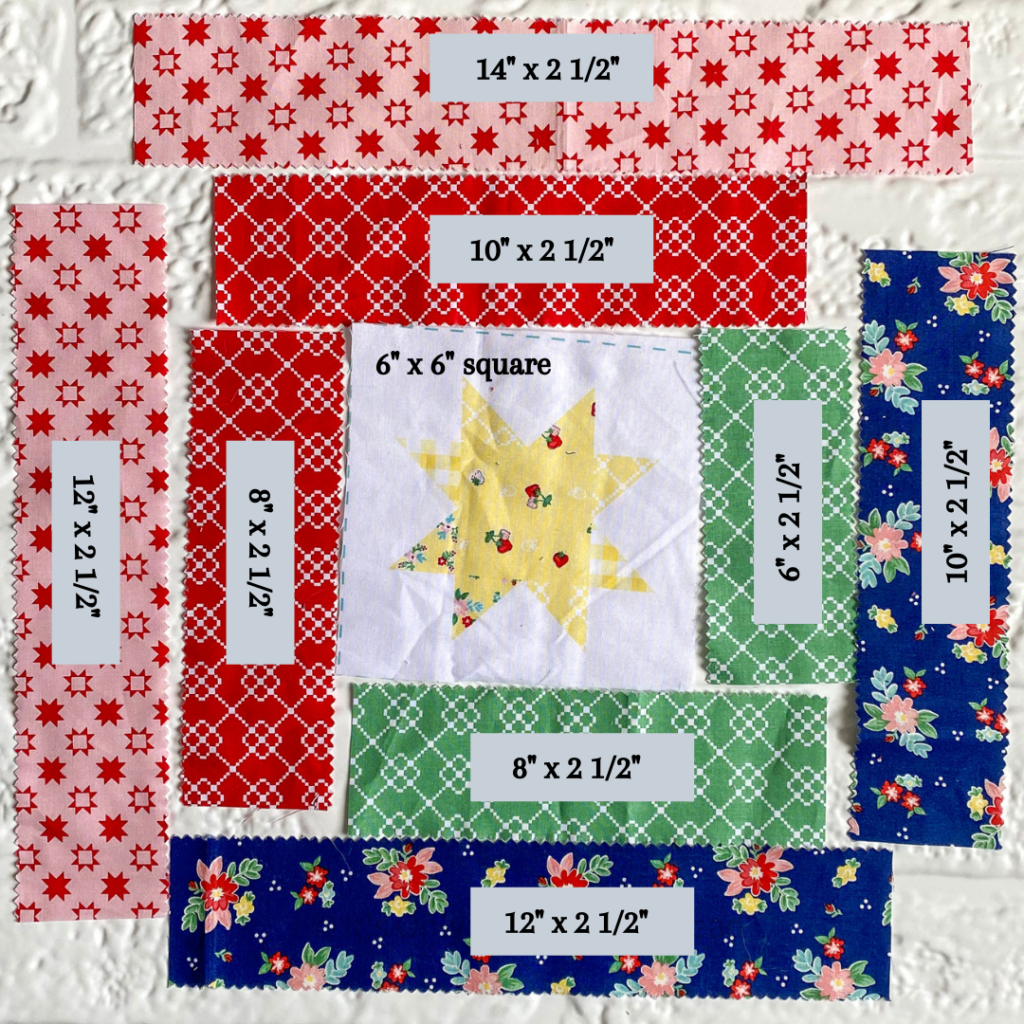
You also need the following sizes of 2 1/2″ strips:
- Color 1 (Green) – (1) 6″ x 2 1/2″ and (1) 8″ x 2 1/2″
- Color 2 (Red) – (1) 8″ x 2 1/2″ and (1) 10″ x 2 1/2″
- Color 3 (Navy) – (1) 10″ x 2 1/2″ and (1) 12″ x 2 1/2″
- Color 4 (Pink) – (1) 12″ x 2 1/2″ and (1) 14″ x 2 1/2″
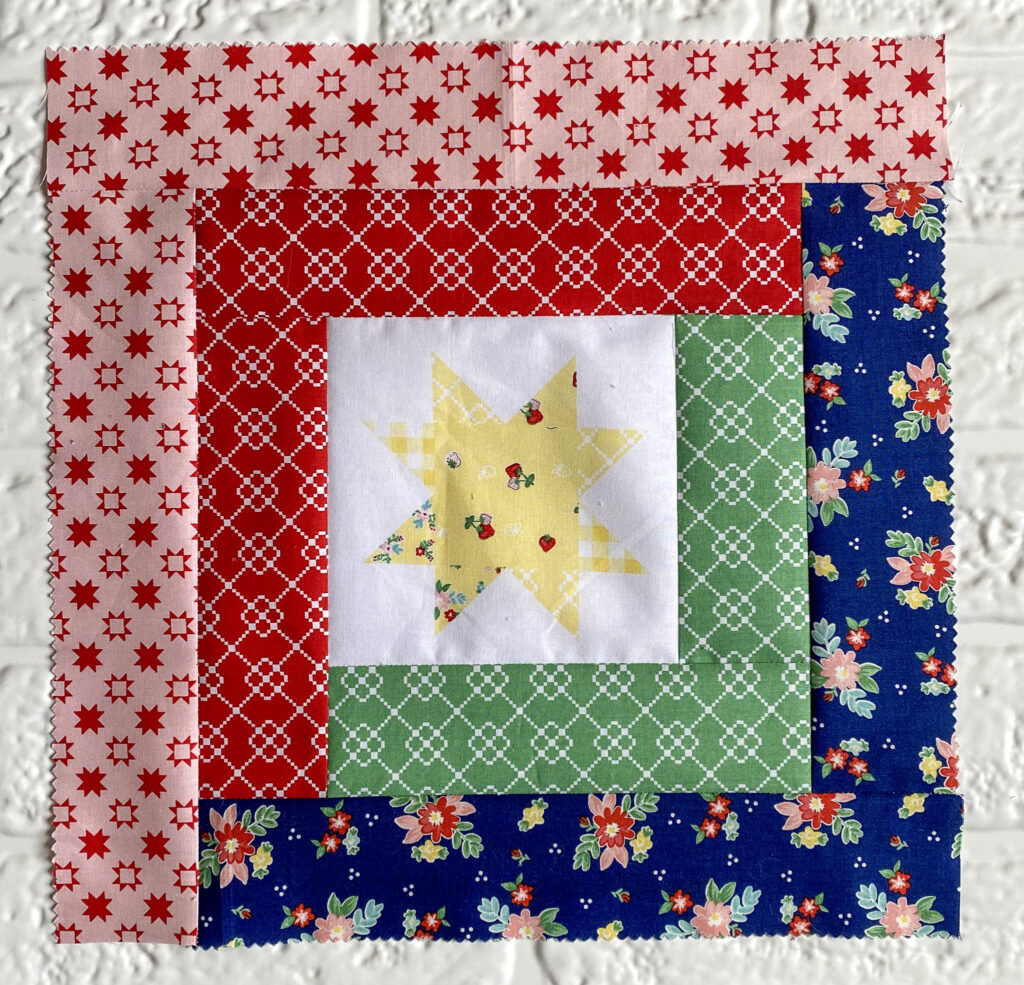
This particular block will be 14″ square unfinished and 13 1/2″ square when finished.
Assembling the Modified Log Cabin Block
To assemble the modified log cabin block, begin by attaching the green 6″ x 2 1/2″ strip to the 6″ star square. Press toward the green strip.
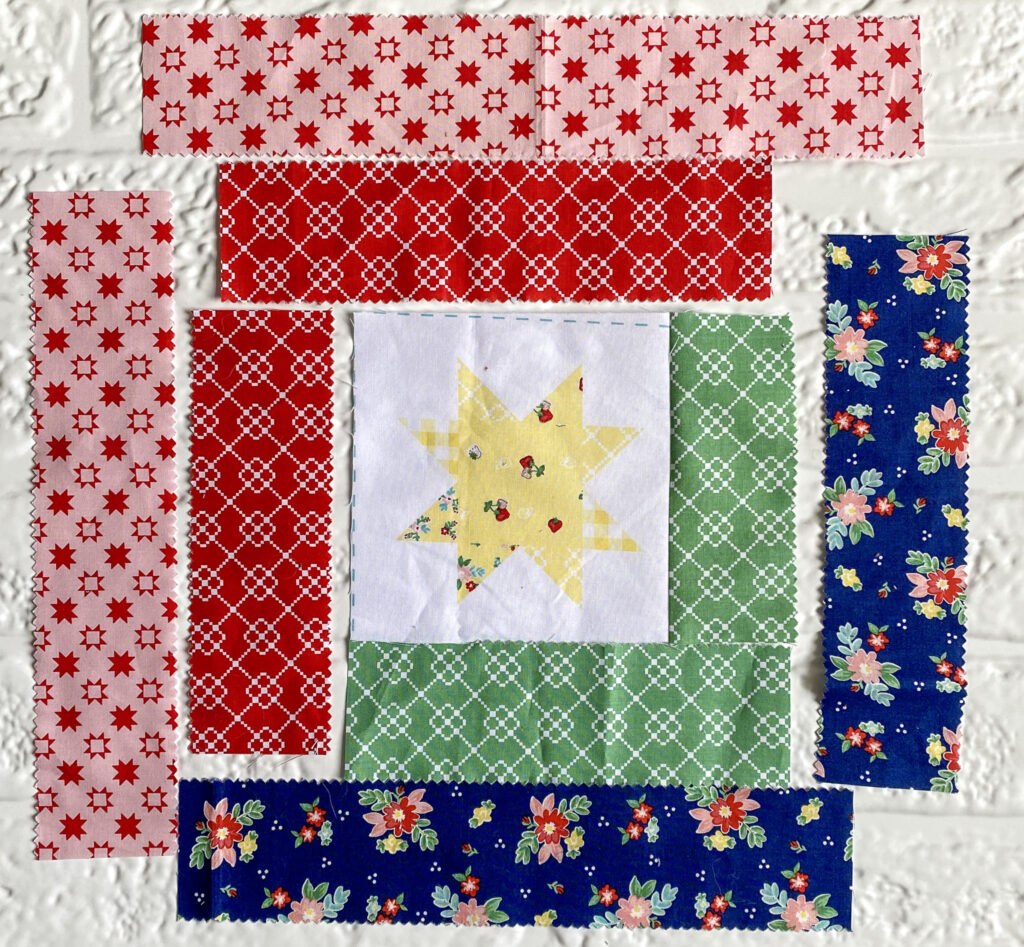
Then, attach the green 8″ x 2 1/2″ strip to the bottom. Press toward the green strip.
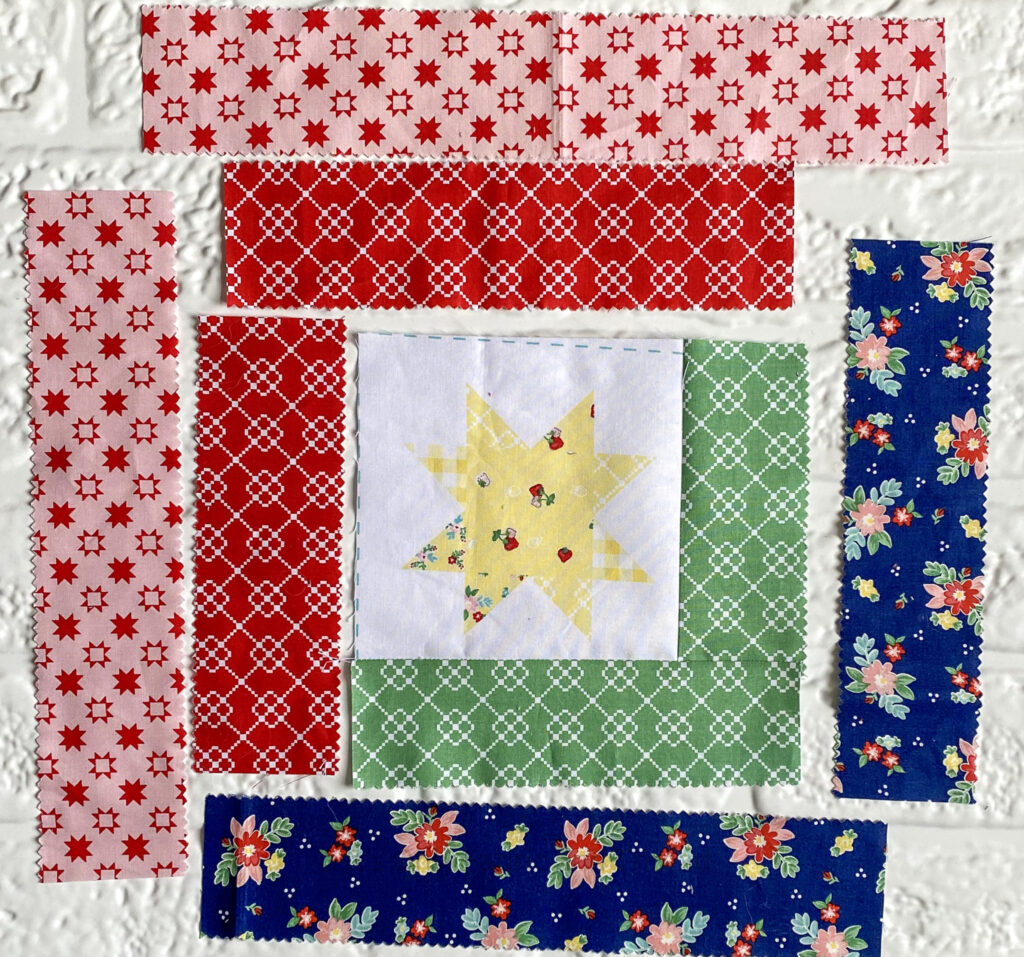
Next, add the red 8″ x 2 1/2″ strip to the left side of the 6″ star square. Press toward the red strip.
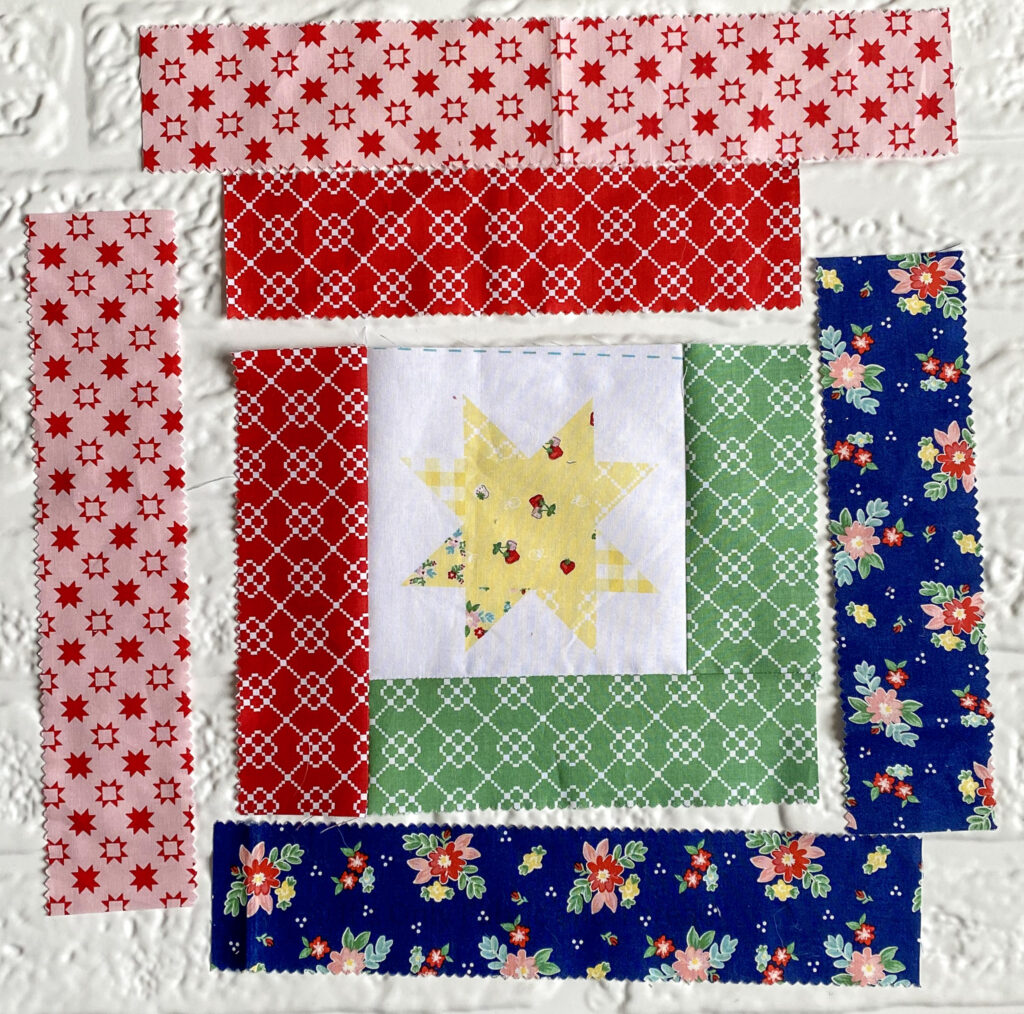
Add the red 10″ x 2 1/2″ strip to the top of the block. Press toward the red strip.
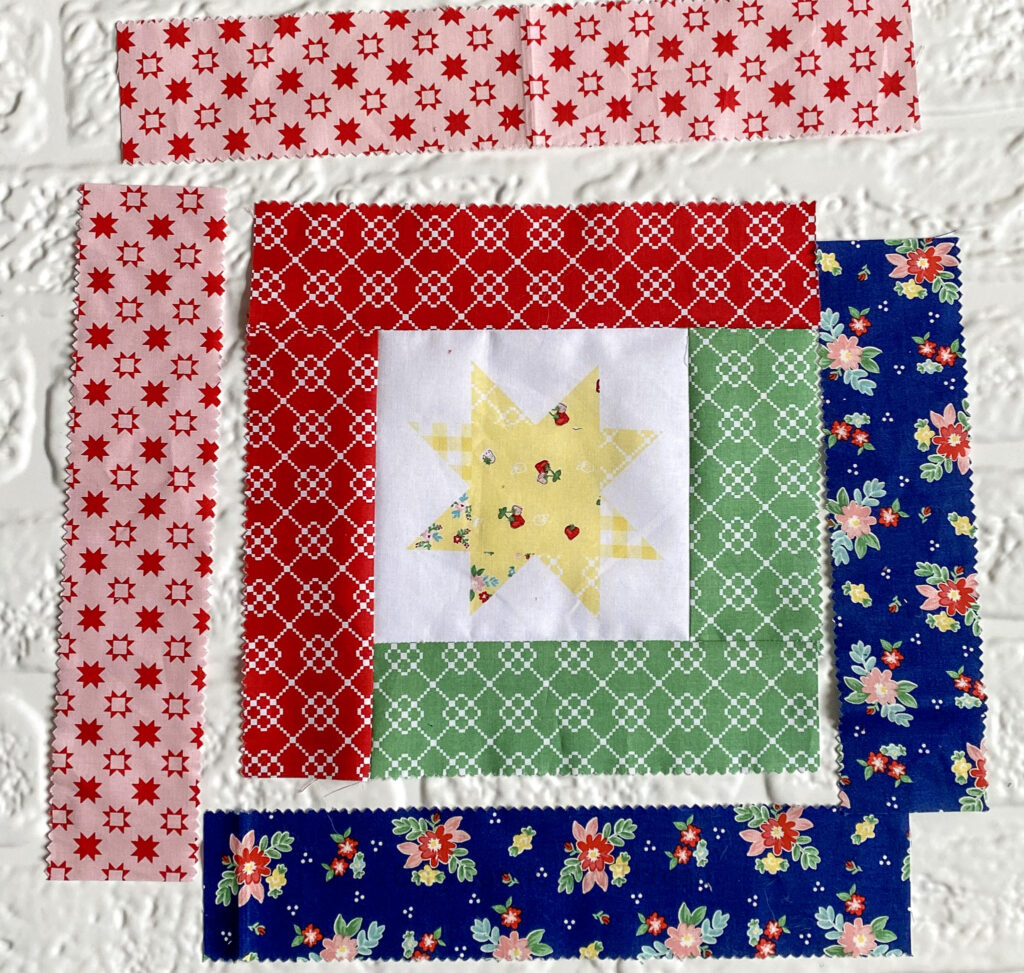
Then, add the navy 10″ x 2 1/2″ strip to the left side of the block. Press toward the navy strip.
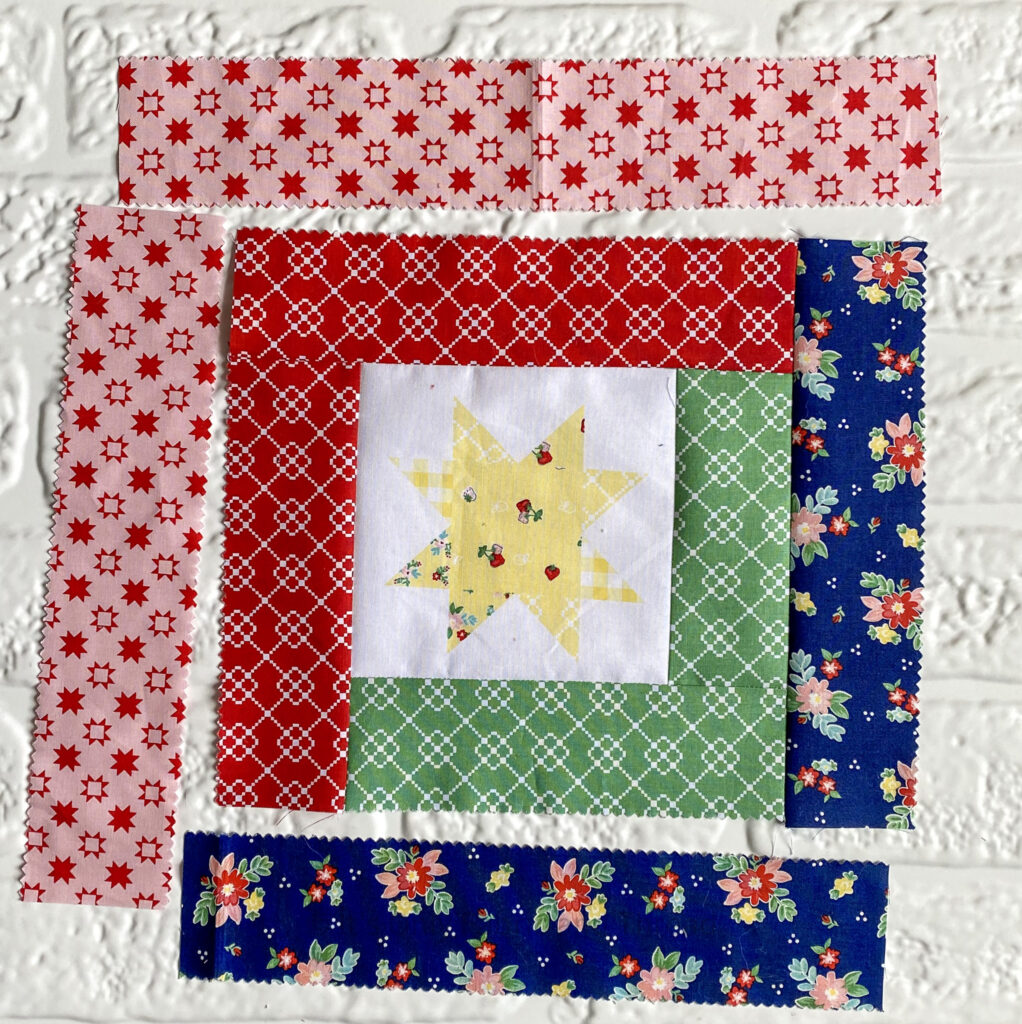
Next, add the navy 12″ x 2 1/2″ strip to the bottom of the block. Press toward the navy strip.
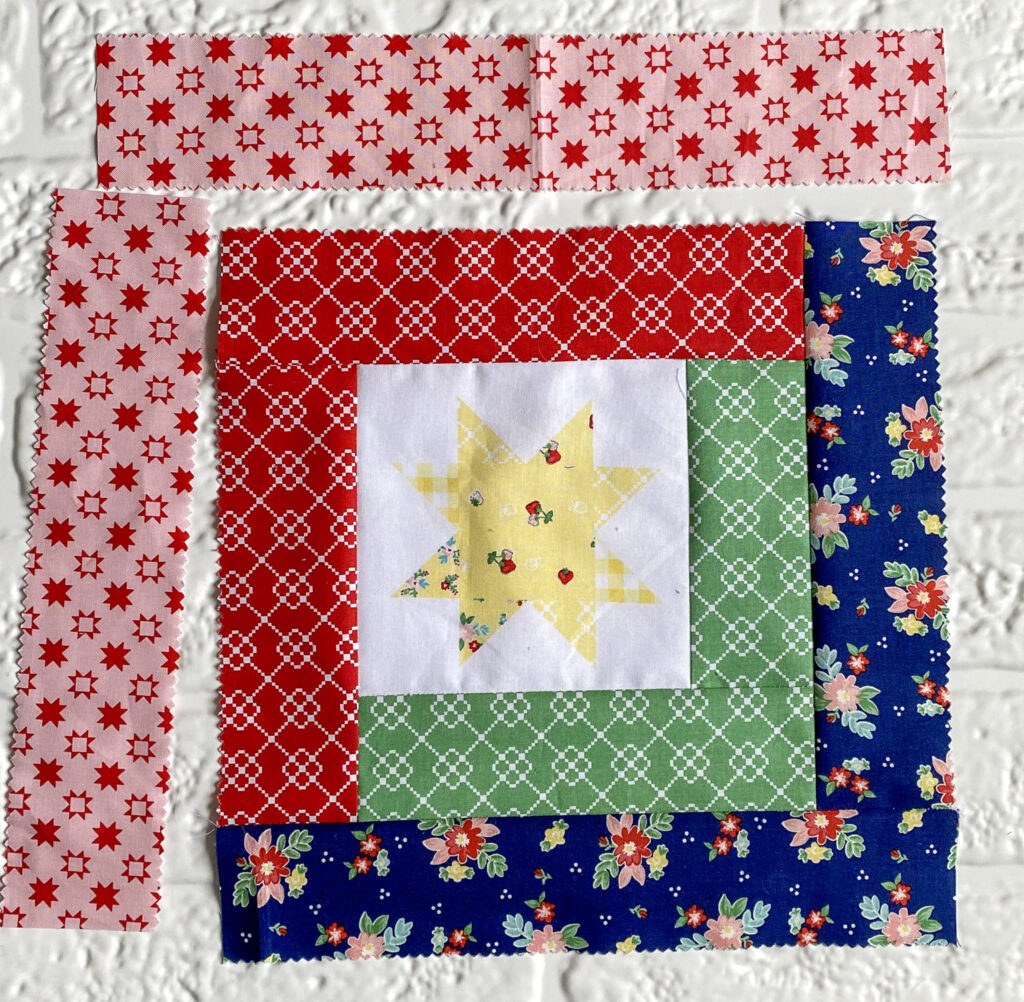
Add the pink 12″ x 2 1/2″ strip to the left of the block. Press toward the pink strip.
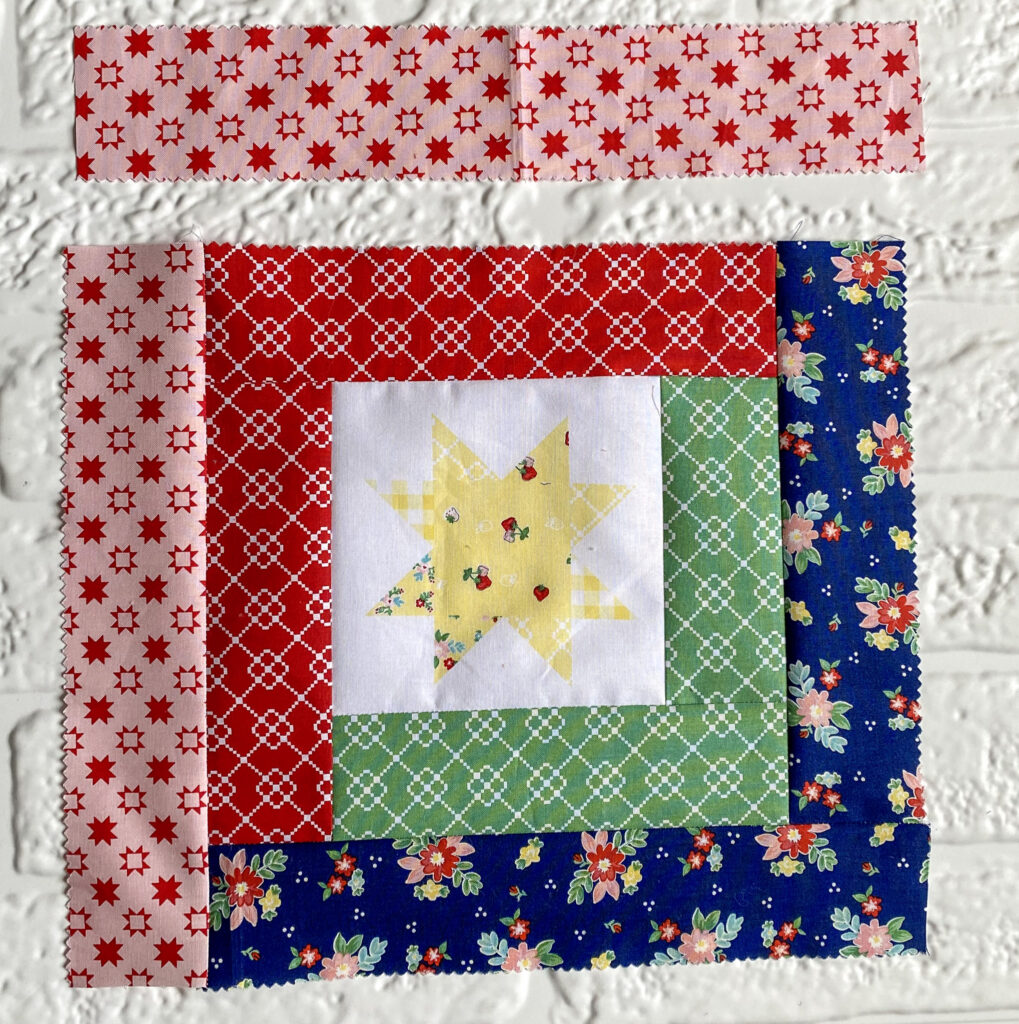
Lastly, add the pink 14″ x 2 1/2″ strip to the top of the block. Press toward the pink strip. The block should measure 14″ square.
Quilt Fair Log Cabin Quilt
So what exactly do I plan to do with all of my Quilt Fair Log Cabin blocks? Make a quilt of course!
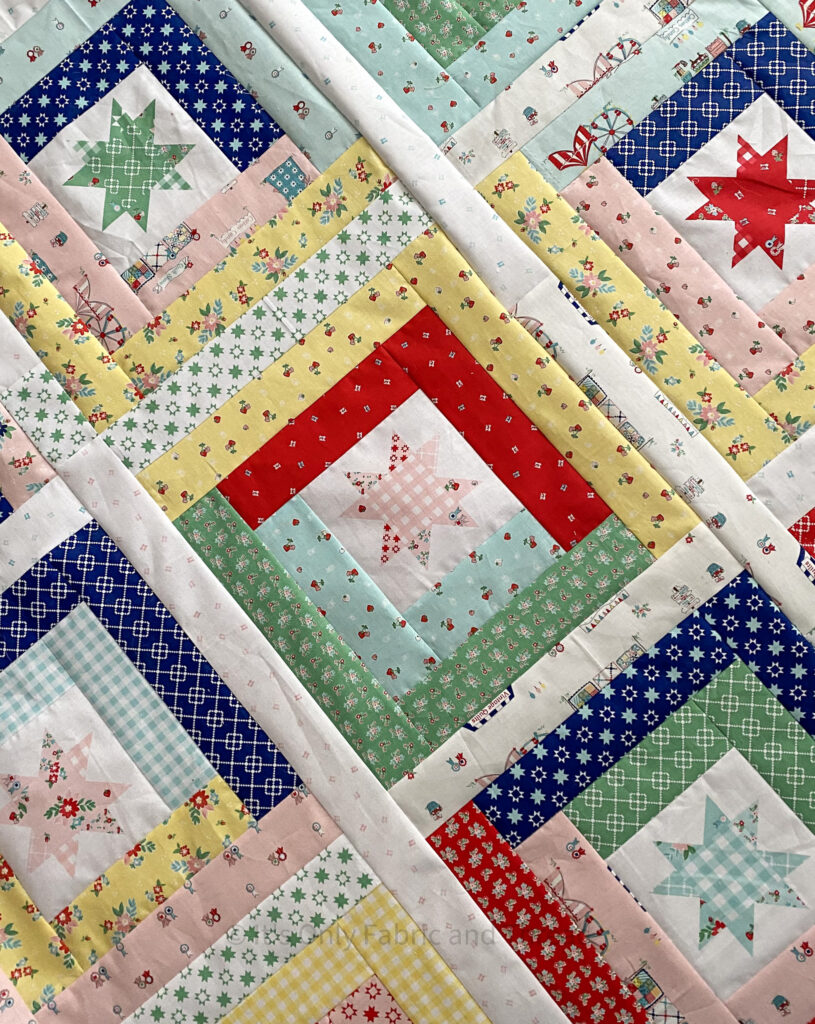
I will be joining them all together with white sashing, specifically the white prints from the quilt fair collection for a controlled scrappy feel.
I will probably keep this as a bedtime hand quilting project – I just finished hand quilting a soon to be released pattern with a scalloped design and now I have a hand quilting void 😂
I’m not entirely finished assembling the quilt top yet, but here is a sneak peak of how it is coming together…
I’ll be sure to share the finished quilt in a supplemental blog post once I have it completed!
